Drawing Basic Shapes绘制基本形状
Many models start with basic shapes. In SketchUp, the shape tools help you draw rectangles, circles, and polygons. 许多模型都是从基本形状开始的。在SketchUp中,形状工具可帮助您绘制矩形、圆形和多边形。You find these tools on the Getting Started toolbar, the Drawing toolbar, and the Large Tool Set toolbar.您可以在“入门”工具栏、“绘图”工具栏和“大型工具集”工具栏上找到这些工具。
Table of Contents目录
Drawing a rectangle or square绘制矩形或正方形
In SketchUp, you can draw rectangles pretty much anywhere:在SketchUp中,您几乎可以在任何地方绘制矩形:
On the ground plane在地面上On a vertical plane在垂直平面上On existing faces在现有面上Separate from existing geometry (aligned to an axes plane)与现有几何图形分离(与轴平面对齐)Inferenced from existing geometry从现有几何图形推断
To draw a rectangle with the Rectangle tool, follow these steps:要使用矩形工具绘制矩形,请执行以下步骤:
Select the Rectangle tool (从工具栏中选择“矩形”工具( ) from the toolbar or press the R key. The cursor changes to a pencil with a rectangle.)或按R键。游标变为带有矩形的铅笔。Tip:
To start over at any point during these steps, press Esc.要在这些步骤中的任何一点重新开始,请按Esc键。Move the cursor diagonally to find the desired size and shape for your rectangle.沿对角线移动游标,为矩形找到所需的大小和形状。To draw the rectangle with precise dimensions, use the Measurements box, which at this point displays your rectangle’s dimensions as you move the cursor.要绘制具有精确尺寸的矩形,请使用“测量”框,当您移动游标时,该框会显示矩形的尺寸。To help you place the rectangle in relation to the drawing axes or other geometry, SketchUp’s inference engine displays on-screen cues.为了帮助您相对于图形轴或其他几何体放置矩形,SketchUp的推理引擎会在屏幕上显示提示。When the inference you need appears, move to Step 4. Both the Measurements box and the Rectangle tool inferences are explained a little later in this section.当您需要的推理出现时,请转到步骤4。本节稍后将解释测量框和矩形工具推断。
As you draw a rectangle, the Measurements box helps you model precisely as follows:绘制矩形时,测量框可帮助您精确建模,如下所示:
Set the length and width.设置长度和宽度。Type a length value, a comma, a width value, and then press Enter.键入长度值、逗号、宽度值,然后按Enter键。For example, type 8‘,20’ and press Enter. If you type only a number or numbers, SketchUp uses the current document units setting.例如,键入8‘,20’,然后按Enter键。如果只键入一个或多个数字,SketchUp将使用当前的文档单位设置。You can also override the document units setting by specifying imperial (such as 1’6") or metric (such as 3.652m) units.您还可以通过指定英制(如1’6")或公制(如3.652m)单位来覆盖文档单位设置。Specify only a length or width.仅指定长度或宽度。If you enter a value and a comma (3‘,), the new value is applied to the first dimension, and the second dimension doesn’t change.如果输入一个值和逗号(3',),则新值将应用于第一个维度,而第二个维度不会更改。Similarly, if you type a comma and then a value (,3’), only the second dimension changes.同样,如果键入逗号,然后键入值(,3'),则只有第二个维度会发生变化。Change the rectangle’s position with negative numbers.用负数更改矩形的位置。If you enter a negative value (–24, –24), SketchUp applies that value in a direction opposite to the one that you indicated while drawing.如果输入负值(–24, –24),SketchUp将沿与绘图时指示的方向相反的方向应用该值。
As you move your cursor with the Rectangle tool selected, the SketchUp inference engine displays the following cues:当您在选定矩形工具的情况下移动游标时,SketchUp推理引擎会显示以下提示:
Square:正方形When the rectangle’s proportions are a perfect square, you see blue dots and the Square ScreenTip appear. See Callout 1.当矩形的比例是一个完美的正方形时,您会看到蓝点,并出现正方形屏幕提示。请参见详图1。Golden section:黄金地段:A golden section is a rectangle in which the ratio of the longer side to the shorter side is a golden ratio. When a rectangle is a golden section, blue dots and the Golden Section Screen tip appear. See Callout 2.黄金分割是一个矩形,其中长边与短边的比率是黄金比率。当矩形是黄金分割时,会出现蓝点和黄金分割屏幕提示。请参见详图2。You can hold down the Shift key to lock this inference while dragging.拖动时可以按住Shift键锁定此推理。

In the video, you can see these features of the Rectangle tool in action.在视频中,您可以看到矩形工具的这些功能正在发挥作用。
Drawing a rotated rectangle绘制旋转矩形
The Rotated Rectangle Tool can come in handy when you need to draw a rectangle whose face is at an angle to SketchUp's default red, green, or blue axes or to other geometry.当您需要绘制一个面与SketchUp的默认红色、绿色或蓝色轴或其他几何体成角度的矩形时,旋转矩形工具可以派上用场。
Like the Rectangle tool, the Rotated Rectangle tool enables you to create precise rectangles and squares and displays inferences to help you as you draw. 与矩形工具一样,旋转矩形工具使您能够创建精确的矩形和正方形,并在绘制时显示推论以帮助您。However, when you create a rectangle with the Rotated Rectangle tool, you position the rectangle at an angle as well. The following figure is an example of a rectangle created with the Rotated Rectangle tool.但是,当您使用“旋转矩形”工具创建矩形时,也会将矩形定位在一个角度。下图是使用“旋转矩形”工具创建的矩形示例。

To create a rotated rectangle, follow these steps:要创建旋转矩形,请执行以下步骤:
On the toolbar, from the Shape Tools menu, select the Rotated Rectangle tool (在工具栏上,从“形状工具”菜单中,选择“旋转矩形”工具( ). )。
). )。Or select Draw > Shapes > Rotated Rectangle from the menu bar.或者从菜单栏中选择“绘制”>“形状”>“旋转矩形”。(Optional) Press an arrow key to set the plane for your rotated rectangle, per the table that appears earlier in this article.(可选)根据本文前面出现的表格,按箭头键设置旋转矩形的平面。For example, press the left arrow key to constrain the plane of your rotated rectangle to the green plane.例如,按向左箭头键将旋转矩形的平面约束到绿色平面。Click once to set the first corner of your rectangle.单击一次以设置矩形的第一个角。Create the first edge of your rotated rectangle. You can do this in two ways:创建旋转矩形的第一条边。您可以通过两种方式做到这一点:Type a precise measurement and press Enter.键入精确的测量值,然后按Enter键。Or move the cursor where you want to place the second endpoint of this edge, using the SketchUp inference engine to position the endpoint in relation to the axes or other geometry, as shown in the following figure, and then click.或者将游标移动到要放置此边的第二个端点的位置,使用SketchUp推理引擎相对于轴或其他几何体定位端点,如下图所示,然后单击。Tip:You can use a few modifier keys as you complete this step.完成此步骤时,您可以使用一些修改键。Hold down the Shift key to constrain the first edge to its current direction.按住Shift键将第一条边约束到其当前方向。The Alt (Windows) or Command (macOS) key locks the protractor plane.Alt(Windows)或Command(macOS)键锁定量角器平面。Or the arrow keys can again help you align the first edge to an axis.或者,箭头键可以再次帮助您将第一条边与轴对齐。Simply press the arrow key that corresponds your desired alignment, as explained earlier in this section.只需按与所需对齐相对应的箭头键,如本节前面所述。For example, press the right arrow key to constrain the first edge so it's aligned with the red axis.例如,按向右箭头键约束第一条边,使其与红色轴对齐。
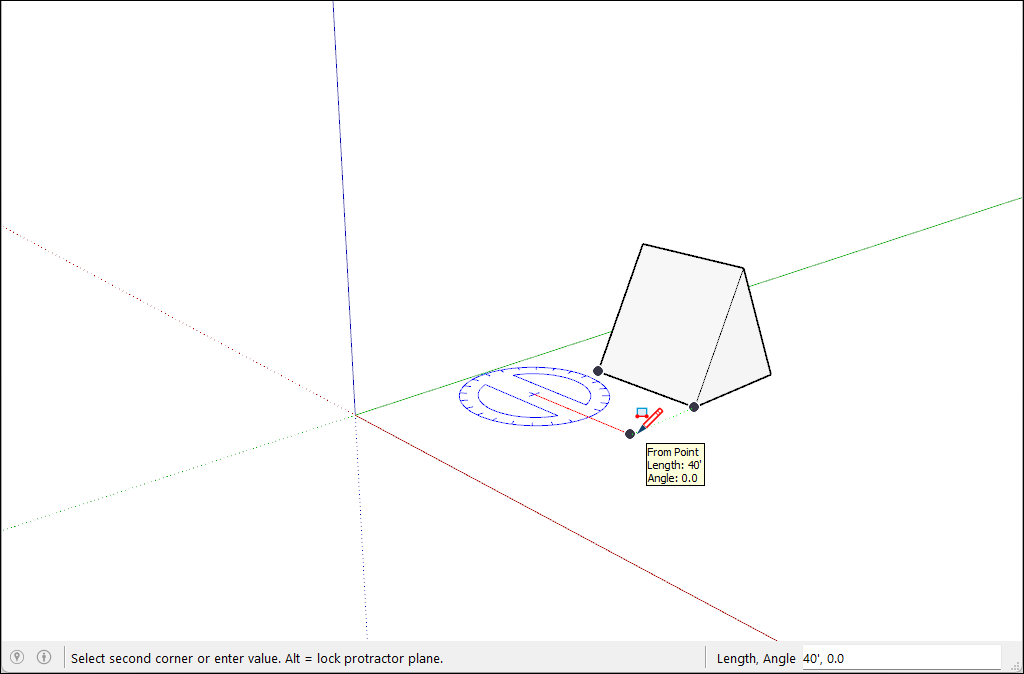
At this point, you set the width and angle of your rectangle.此时,您可以设置矩形的宽度和角度。You can set these values in a few different ways:您可以通过几种不同的方式设置这些值:Type an angle and width into the Measurements box, following the prompt.按照提示在“测量”框中键入角度和宽度。Type a width and angle into the Measurements box, following the prompt.按照提示在“测量”框中键入宽度和角度。Move around the protractor to set the angle, and move your cursor away from the center of the protractor to set the width, as shown in the following figure.围绕量角器移动以设置角度,然后将游标移离量角器的中心以设置宽度,如下图所示。To constrain the angle, hold down the Shift key.要约束角度,请按住Shift键。Click to finish creating the rotated rectangle.单击以完成创建旋转矩形。
Drawing a circle or ellipse绘制圆形或椭圆形
Before you draw a circle, it’s helpful to understand how SketchUp creates circle entities:在绘制圆之前,了解SketchUp如何创建圆实体是有帮助的:
Circle entities have a radius and connect multiple line segments.圆实体具有半径,并连接多条线段。These segments act as a single line in that they can define the edge of a face and divide a face. Additionally, selecting one segment selects the entire circle entity.这些线段充当一条直线,因为它们可以定义面的边缘并分割面。此外,选择一个线段会选择整个圆实体。SketchUp’s inference engine still sees the segments in the circle. So, if you hover your mouse around the circumference of the circle entity, you’ll see endpoint and midpoint inferences.SketchUp的推理引擎仍然可以看到圆中的线段。因此,如果将鼠标悬停在圆实体的圆周上,您将看到端点和中点推断。
To draw a circle, follow these steps:要绘制圆,请执行以下步骤:
On the toolbar, select the Circle tool (在工具栏上,从矩形工具旁边的下拉菜单中选择“圆形”工具( ) from the drop-down menu next to the Rectangle tool. )。
Or press the C key. The cursor changes to a pencil with a circle, and the Measurements box indicates the default number of sides: 24, as shown in the figure.或者按C键。游标变为带圆圈的铅笔,测量框指示默认的边数:24,如图所示。To change the number of sides, you can type a value now or wait until after you’re done drawing the circle.要更改边的数量,您可以现在键入一个值,也可以等到绘制完圆后再键入。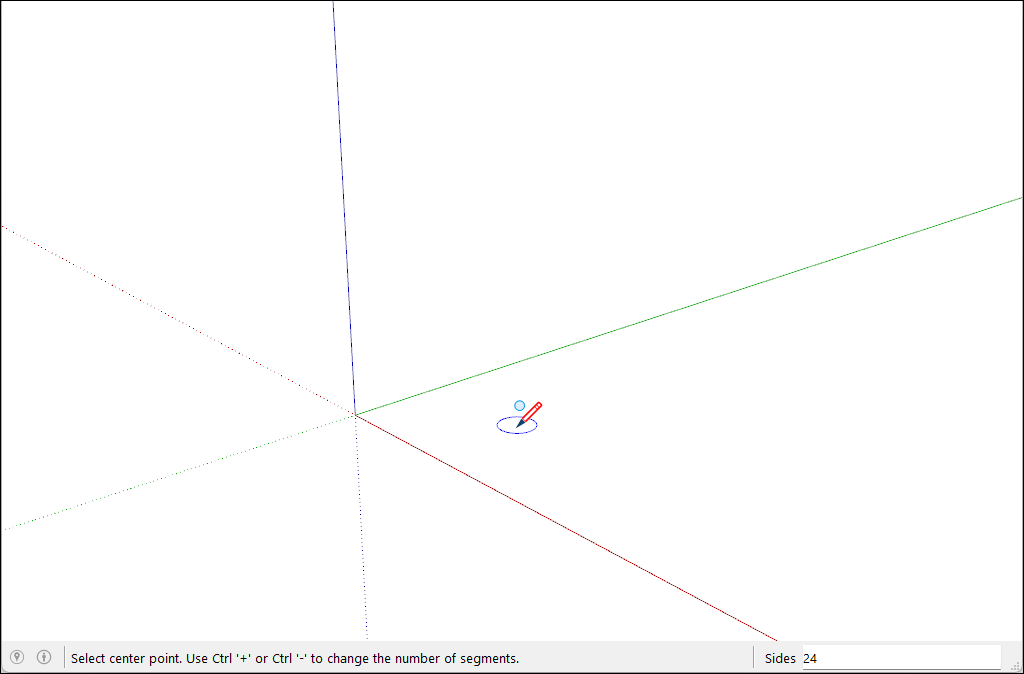
Move the cursor out from the center point to define the circle’s radius. As you move the cursor, the radius value is displayed dynamically in the Measurements box. Press Esc at any point to start over.将游标从中心点移出以定义圆的半径。移动游标时,半径值会动态显示在“测量”框中。在任何时候按Esc键重新开始。Click to finish the circle. SketchUp creates a circle-shaped face, as shown in the figure.单击以完成圆。SketchUp创建了一个圆形面,如图所示。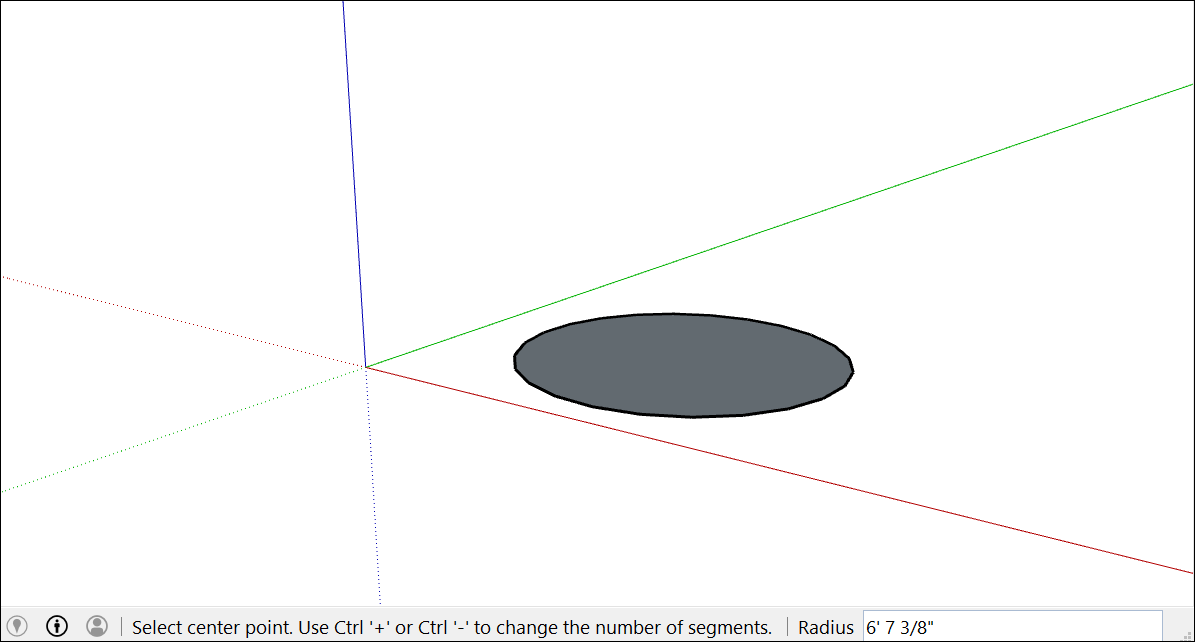
(Optional) Until you select a new tool or draw a new circle, you can use the Measurements box to change the circle’s radius or the number of sides as follows:(可选)在选择新工具或绘制新圆之前,您可以使用“测量”框更改圆的半径或边数,如下所示:To change the radius:要更改半径,请执行以下操作:Type a number and a unit (if desired), such as 6”, 8’, 34cm, or 7m. Then press Enter or Return.键入一个数字和单位(如果需要),如6"、8'、34cm或7m。然后按Enter或Return键。Tip:The Entity Info dialog box offers a handy way to edit the sides and radius values anytime. See Editing shapes later in this article for details.“实体信息”对话框提供了一种方便的方法,可以随时编辑边和半径值。有关详细信息,请参阅本文后面的编辑形状。
To draw an ellipse or oval, follow these steps:要绘制椭圆或卵形,请执行以下步骤:
Draw a circle with the Circle tool.用“圆”工具画一个圆。Select the Scale tool (选择“缩放”工具( ).)。
).)。Click the circle. A bounding box with eight green grips is displayed around the circle.单击圆。圆圈周围将显示一个带有八个绿色夹点的边界框。Click one of the middle grips (not one of the corner grips) and move the mouse to pull the circle into an ellipse, as shown here.单击中间夹点之一(不是角夹点之一),然后移动鼠标将圆拉成椭圆,如图所示。Click again when you’re done scaling the circle.缩放圆后再次单击。

Drawing a polygon绘制多边形
You can create polygon entities with the Polygon tool. Here are a few facts that may come in handy when you create them:可以使用“多边形”工具创建多边形实体。以下是一些在创建它们时可能会派上用场的事实:
In SketchUp, a polygon has a radius and 3 or more sides. So the size of your polygon is measured from a center point, and the number of sides determines the type of polygon you draw. A pentagon as 5 sides; an octagon has 8 sides.在SketchUp中,多边形具有半径和3条或更多边。因此,多边形的大小是从中心点开始测量的,边的数量决定了绘制的多边形的类型。五边形:有五条边的五边形;八边形有8条边。Polygon entities act as a single line in that they can define the edge of a face and also divide a face. Selecting one side of the polygon selects the entire polygon.多边形实体充当单线,因为它们可以定义面的边缘,也可以分割面。选择多边形的一侧将选择整个多边形。The SketchUp inference engine interprets each side of a polygon as a segment. As you hover your cursor over a polygon, you see endpoint, midpoint, and from point inferences.SketchUp推理引擎将多边形的每条边解释为一个线段。当您将游标悬停在多边形上时,您会看到端点、中点和起点推断。You can draw polygons on faces or separate from existing geometry.您可以在面上绘制多边形,也可以将其与现有几何体分离。
Follow these steps to draw a polygon:按照以下步骤绘制多边形:
Select the Polygon tool (选择工具栏上的“多边形”工具( ) on the toolbar. The cursor changes to a pencil with a polygon. )。游标变为带有多边形的铅笔。
The Measurements box indicates the current number of sides.测量框指示当前的边数。To change the number of sides in your polygon, you can type a number value now or wait until after you’re done drawing.要更改多边形中的边数,您可以现在键入一个数值,也可以等到绘图完成后再键入。Move the cursor out from the center point to define the radius of your polygon. As you move the cursor, the radius value is displayed dynamically in the Measurements box.将游标从中心点移出以定义多边形的半径。移动游标时,半径值会动态显示在“测量”框中。To specify the radius, type a value and press Enter.要指定半径,请键入一个值并按Enter键。You can also press Esc to start over.您也可以按Esc重新开始。Click a second time to finish the polygon. Here, you see a 5-sided polygon.再次单击以完成多边形。在这里,你看到一个5边多边形。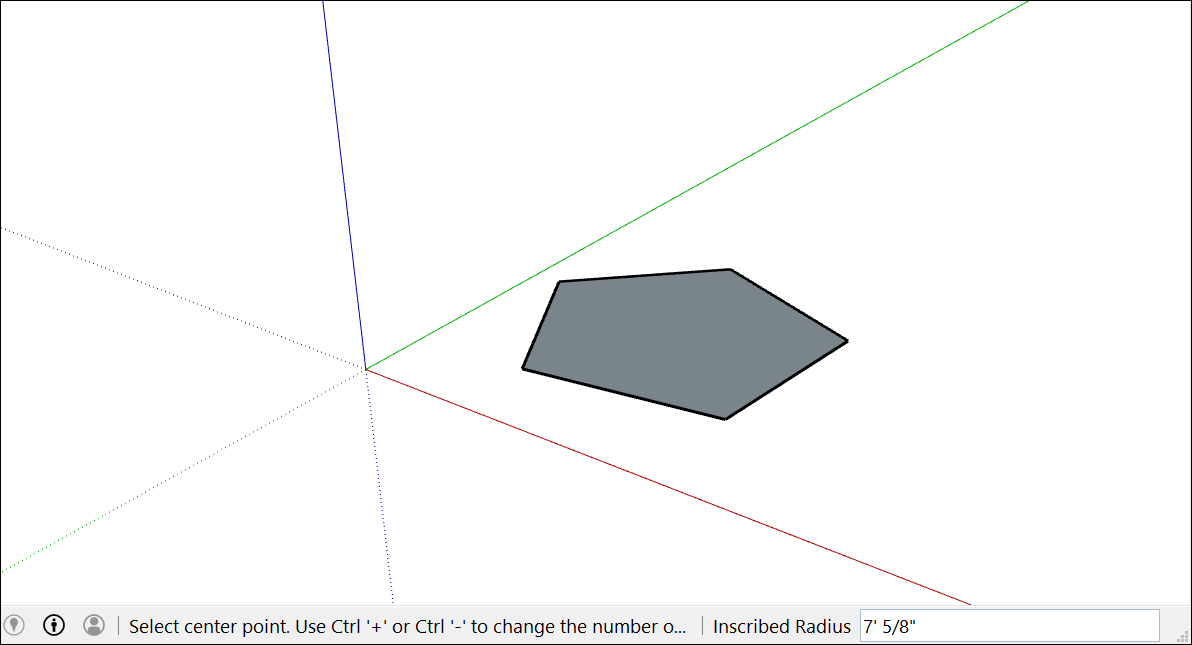
(Optional) Until you select a new tool or draw a new polygon, you can use the Measurements box to change the radius or the number of sides as follows:(可选)在选择新工具或绘制新多边形之前,您可以使用“测量”框更改半径或边数,如下所示:To change the number of sides:要更改边数,请执行以下操作:Type a number and the letter S (for example, type 5s for 5 sides or 42s for 42 sides). Then press Enter.键入一个数字和字母S(例如,键入5s表示5边,键入42s表示42边)。然后按Enter键。
Tip:Although the Polygon tool works similarly to the Circle tool, the difference between the tools becomes apparent when you push/pull a circle or polygon into a 3D shape.虽然“多边形”工具的工作方式与“圆”工具相似,但当您将圆或多边形推/拉成3D形状时,这两个工具之间的区别就会变得明显。The circle’s edges look smooth, but a polygon’s edges show distinct sides, as shown here.圆的边看起来很平滑,但多边形的边显示出不同的边,如图所示。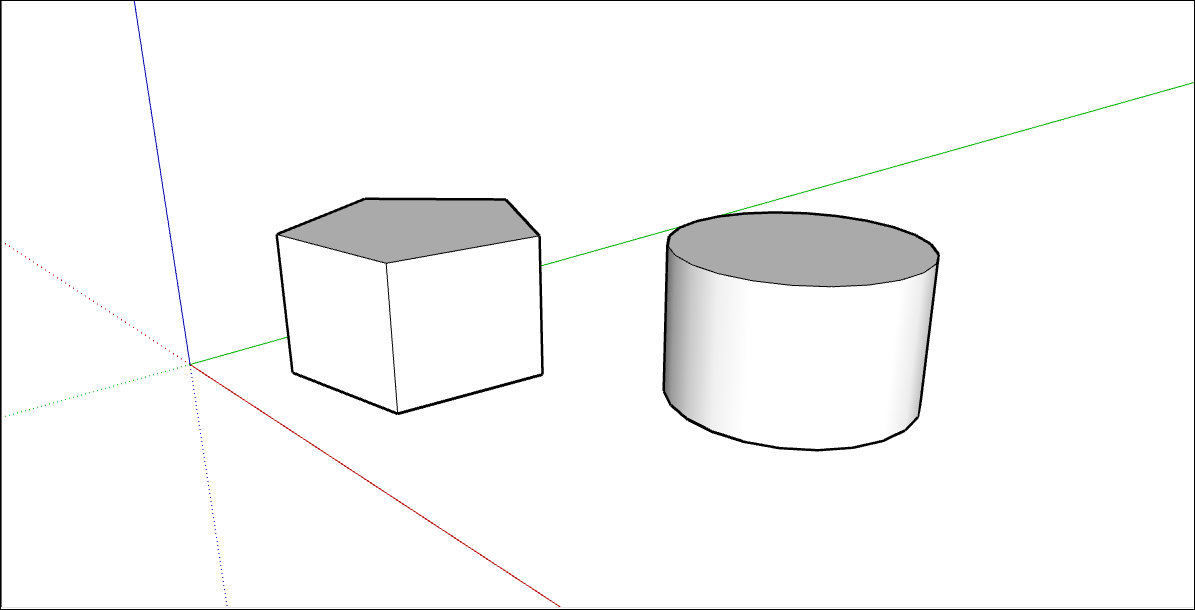
Editing shapes编辑形状
The Entity Info dialog box enables you to change a circle or polygon’s radius or sides anytime after you create the shape. Here’s how:“实体信息”对话框允许您在创建形状后随时更改圆或多边形的半径或边。方法如下:
Context-click an edge (not the face) of a circle or polygon that you want to edit.右键单击要编辑的圆或多边形的边(而不是面)。Select Entity Info from the context menu that appears, as shown here.从出现的上下文菜单中选择实体信息,如图所示。
In the Entity Info panel, click in the Radius or Segments box, change the value, and press Enter (Microsoft Windows) or Return (Mac).在“实体信息”面板中,单击“半径”或“分段”框,更改值,然后按Enter键(Microsoft Windows)或Return键(Mac)。After you press Enter or Return, your shape immediately reflects your changes.按Enter或Return键后,您的形状会立即反映您的更改。
SketchUp doesn’t enable you to modify the width or length of a rectangle at anytime. SketchUp不允许您随时修改矩形的宽度或长度。If you’ve already selected another tool or drawn additional rectangles, you need to erase the rectangle you want to change and redraw it. 如果您已经选择了其他工具或绘制了其他矩形,则需要擦除要更改的矩形并重新绘制。See Drawing a rectangle for details. Or resize the rectangle with the Scale tool if you don't need to enter precise dimensions.有关详细信息,请参阅绘制矩形。或者,如果不需要输入精确的尺寸,可以使用“缩放”工具调整矩形的大小。
Of course, you can do much more than simply change a shape’s size. 当然,你可以做的不仅仅是改变形状的大小。You can turn a 2D shape into a 3D shape with the Push/Pull tool. 您可以使用推/拉工具将二维形状转换为三维形状。You can distort shapes with the Move tool or scale all or part of your model.您可以使用“移动”工具扭曲形状,也可以缩放模型的全部或部分。