Getting Started with Modeling from Trimble Vision Imagery从Trimble视觉图像开始建模
By using Trimble Vision Imagery to collect precisely located imagery, you can now use Trimble Business Center (TBC) to generate key points from the collected data that will aid the modeling process within SketchUp.通过使用Trimble Vision Imagery集合精确定位的图像,您现在可以使用TrimbleBusiness Center(TBC)从集合的数据中生成关键点,这将有助于SketchUp中的建模过程。
Note: This article assumes that you have a good understanding of drawing geometry and making components. For more information about the process performed in Trimble Business Center (TBC), please consult the TBC Help system. This article only addresses the process of importing the .skp file generated from TBC onward.注意:本文假设您对绘制几何图形和制作组件有很好的理解。有关在Trimble Business Center(TBC)中执行的流程的更多信息,请参阅TBC帮助系统。本文仅介绍从TBC开始导入skp文件的过程。
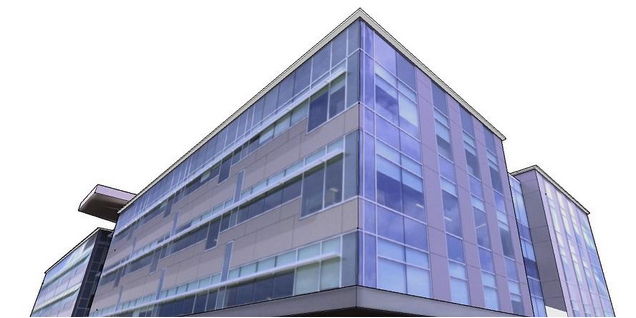
Open the .skp file that was exported from Trimble Business Center (TBC) via File > Open.通过“文件”>“打开”打开从Trimble Business Center(TBC)导出的.skp文件。Once imported, you will see the guide points generated from TBC as seen below:导入后,您将看到TBC生成的引导点,如下所示: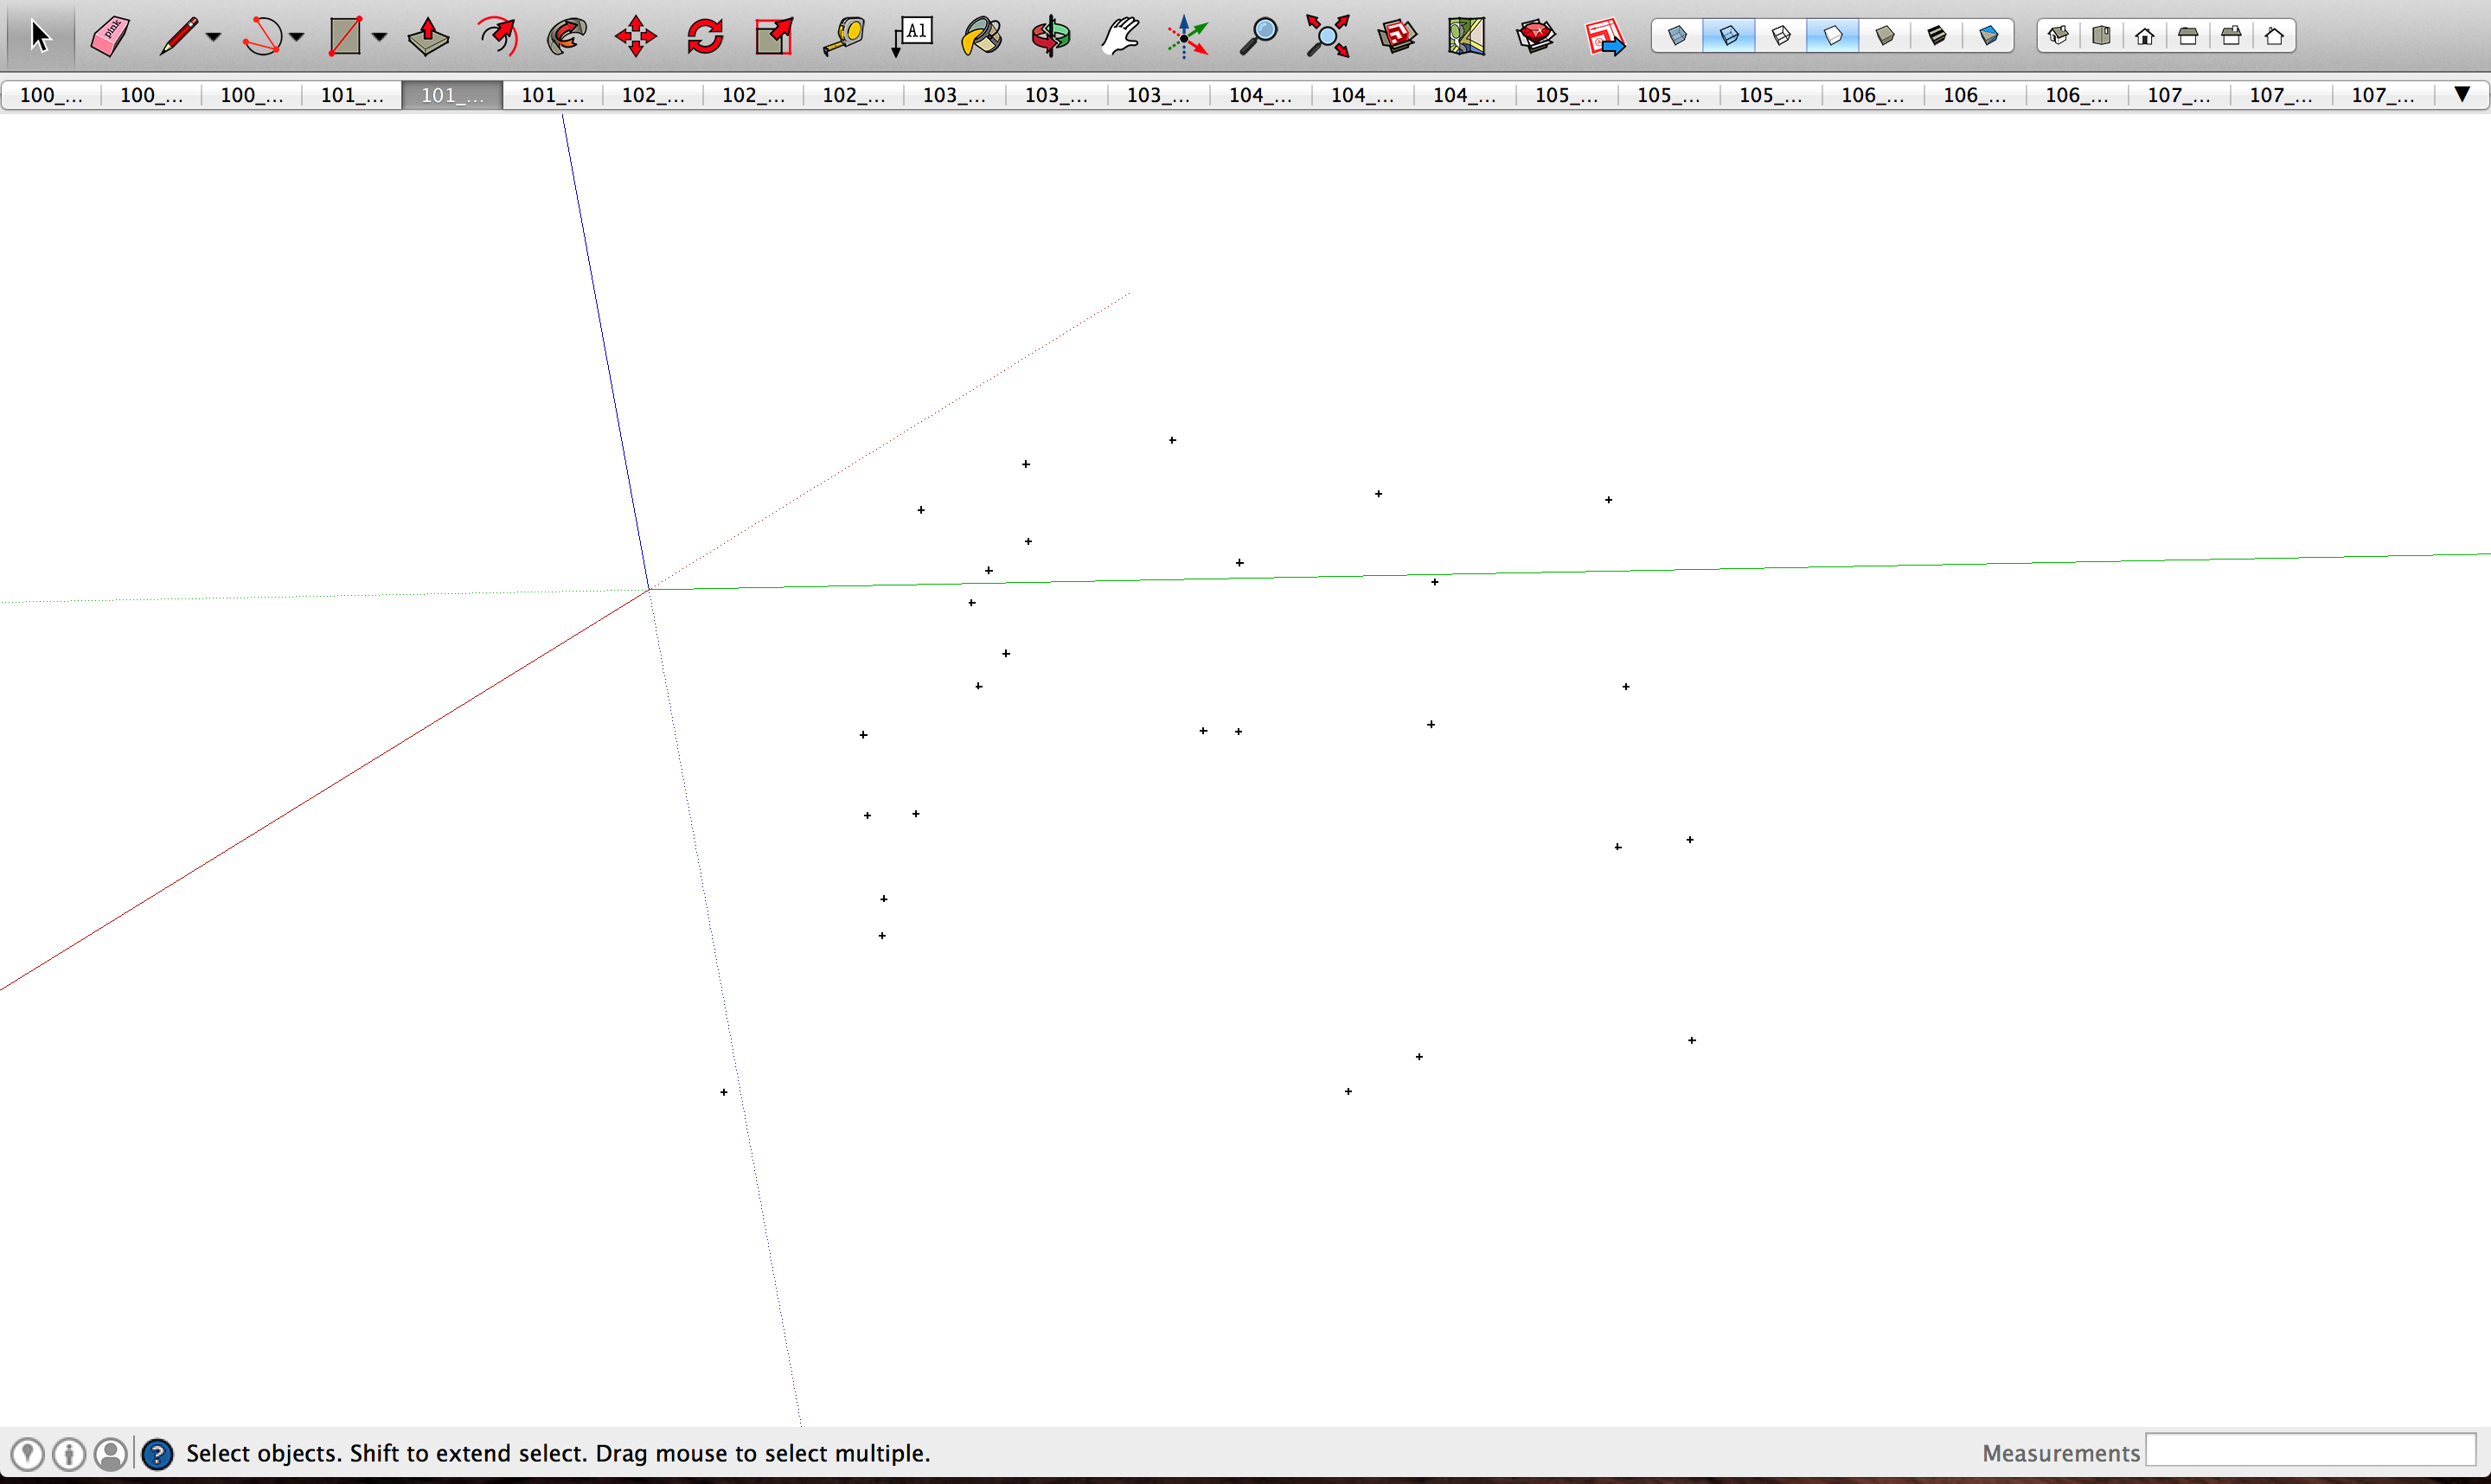
Each panoramic image is imported as its own Match Photo Scene which are located across the top of the modeling window. Scenes can be modified by using the Window > Scenes window or by right-clicking an individual scene tab at the top of the modeling window.每个全景图像都作为其自己的匹配照片场景导入,该场景位于建模窗口的顶部。可以使用“窗口>场景”窗口或右键单击建模窗口顶部的单个场景选项卡来修改场景。Note: When importing V10 data, the imagery captured from the downward facing cameras could be included. To delete unwanted images, simply delete them by using the described methods above.注意:导入V10数据时,可以包括从朝下的摄像头捕获的图像。要删除不需要的图像,只需使用上述方法删除它们。The blue axis will be oriented in its native vertical direction. However, the red and green axes will need to be aligned with the orientation of the building.蓝色轴将沿其原始垂直方向定向。但是,红色和绿色轴需要与建筑物的方向对齐。To do this, use the Axes tool (为此,请使用“轴”工具()设置模型轴,使连续的几何图形与建筑方向正确对齐。 ) to set the model axes so successive geometry is properly aligned with the building orientation.
To start modeling, use the Image Igloo View (Camera > Image Igloo) to navigate to a Matched Photo Scene with a guide point present and press Enter or double-click the scene to activate the highlighted scene.要开始建模,请使用图像圆顶视图(“相机”>“图像圆顶”)导航到存在引导点的匹配照片场景,然后按Enter键或双击场景以激活突出显示的场景。In this example, we will be modeling this building starting with the guide point shown below:在这个例子中,我们将从下面显示的指导点开始对这座建筑进行建模:Use the Line tool (使用线工具()从引导点到角绘制一条线,推断出蓝色轴,如黄色所示: ) to draw a line from the guide point to the corner inferencing the blue axis as shown here in yellow:
Now use the Line tool (现在使用线工具() to draw the face of the building inferencing the axes. )绘制建筑物的面,推断出轴线。It is helpful to use the zoom feature as you draw:在绘图时使用缩放功能很有帮助:
Once one face of the building is modeled, use the Push/pull tool (一旦建筑的一个面被建模,使用推/拉工具( ) to create the basic 3D structure of the building:)创建建筑的基本3D结构:
Continue modeling by using the Image Igloo View to navigate between scenes and use the guide points generated in TBC. If needed, use the Photo Point tool(使用Image Igloo View在场景之间导航并使用TBC中生成的引导点继续建模。如果需要,请使用“照片点”工具(Photo Point tool( ) to manually create camera guidelines that can be used for geometry when guide points are not available.)手动创建相机指导线,当指导点不可用时,这些指导线可用于几何体。
Once finished, textures can be applied to your model by using the Position Texture tool or by using the "Project textures from photo" function within the Match Photo window.完成后,可以使用“位置纹理”工具或“匹配照片”窗口中的“从照片投影纹理”功能将纹理应用于模型。