Sculpting and Fine-Tuning Terrain雕刻和微调地形
Whether you import terrain into SketchUp or create your terrain completely from scratch, you likely need to sculpt your terrain or make minor adjustments.无论是将地形导入SketchUp还是完全从头开始创建地形,您都可能需要雕刻地形或进行微调。
With specialized Sandbox tools, you can create berms, ponds, terraced landscapes, and so on. The Smoove tool enables you to model hills and valleys on a TIN (triangulated irregular network). 使用专门的沙盒工具,您可以创建护堤、池塘、梯田景观等。Smoove工具使您能够在三角网(三角不规则网络)上对丘陵和山谷进行建模。With the Add Detail tool, you can split a selection within a TIN into smaller triangles so that you can model detail where its needed.使用“添加细节”工具,您可以将三角网中的选择拆分为较小的三角形,以便在需要的地方对细节进行建模。
If you imported contours or terrain from Google Earth, a few edges are likely creating unwanted flat spots on your terrain. 如果您从Google Earth导入了等高线或地形,则一些边可能会在地形上创建不需要的平点。This problem is so common, SketchUp includes a tool dedicated to fixing it: the Flip Edge tool.这个问题非常常见,SketchUp提供了一个专门用于修复它的工具:Flip Edge工具。
In the following sections, you find steps and examples that walk you through the process of sculpting or fine-tuning your TIN. When you’re done shaping your TIN, you can set other things, like buildings or pathways, on top of the terrain, as explained in Placing Objects on Terrain.在以下部分中,您将找到引导您完成雕刻或微调三角网过程的步骤和示例。当您完成三角网的造型后,您可以在地形上设置其他东西,如建筑物或道路,如“在地形上放置对象”中所述。
Table of Contents目录
Smooving hills and valleys烟雾弥漫的丘陵和山谷
The Smoove tool’s capabilities are as cool as its name, which is a portmanteau of smooth and move. To sculpt your terrain with the Smoove tool, follow these steps:Smoove工具的功能与其名称一样酷,它是平滑和移动的组合。要使用Smoove工具雕刻地形,请执行以下步骤:
(Optional) With the Select tool ((可选)使用“选择”工具( ), select the area of your TIN that you want to smoove.),选择要平滑的三角网区域。
Select the Smoove tool (从沙盒工具栏中选择Smoove工具( ) from the Sandbox toolbar or select Tools > Sandbox > Smoove from the menu bar. ),或从菜单栏中选择工具>沙盒>Smoove。
You see the Smoove cursor, shown in the following figure. The red circle represents the circular area that the Smoove tool will bulge or sink.您可以看到Smoove游标,如下图所示。红色圆圈表示Smoove工具将凸起或凹陷的圆形区域。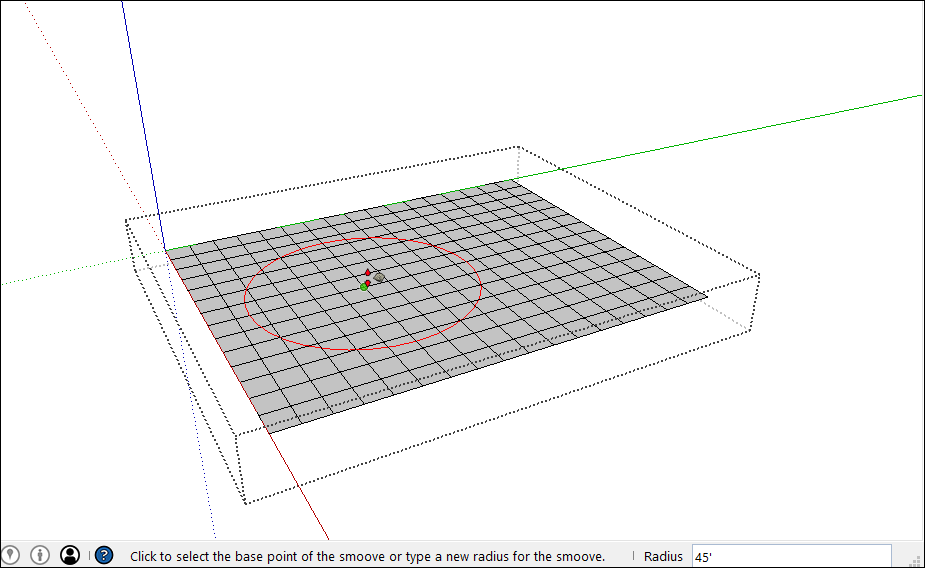
(Optional) Type a radius for the Smoove tool operation and press Enter (Microsoft Windows) or Return (Mac OS X). In the preceding figure, the radius is 45 feet.(可选)键入Smoove工具操作的半径,然后按Enter键(Microsoft Windows)或Return键(Mac OS X)。在上图中,半径为45英尺。With the Smoove tool cursor, click to set a center point for smooving. The vertices that the Smoove tool selects light up in yellow anticipation of their elevation changes, as shown in the following figure.使用Smoove工具游标,单击以设置平滑的中心点。Smoove工具选择的顶点会亮起黄色,以预测其高程变化,如下图所示。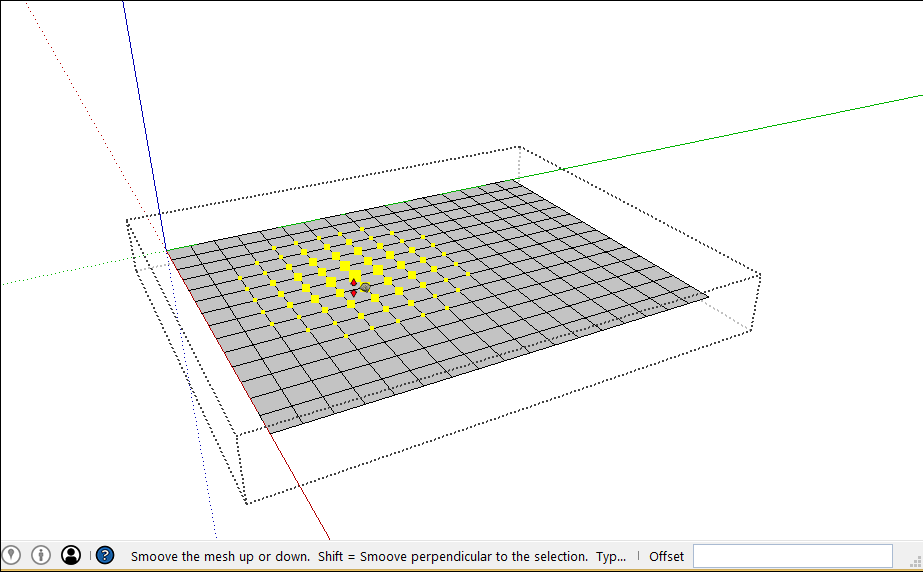
(Optional) Type a value to specify how far you want to offset the selection.(可选)键入一个值以指定要偏移选择的距离。Type a positive value, like 10‘, to make a hill. Or use a negative value like –10’ to create a valley, as shown in the figure.键入一个正值,如10',以创建一个山。或者使用负值,如-10',创建一个山谷,如图所示。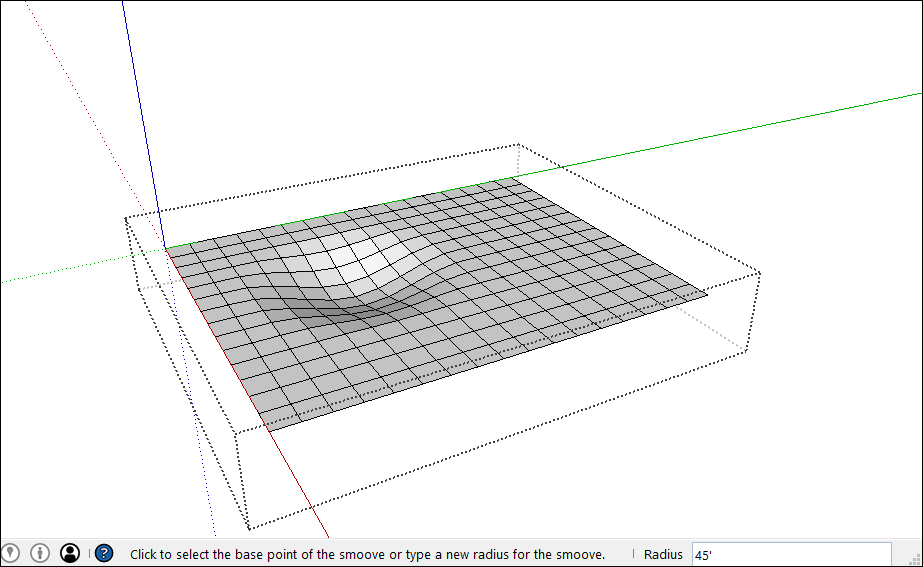
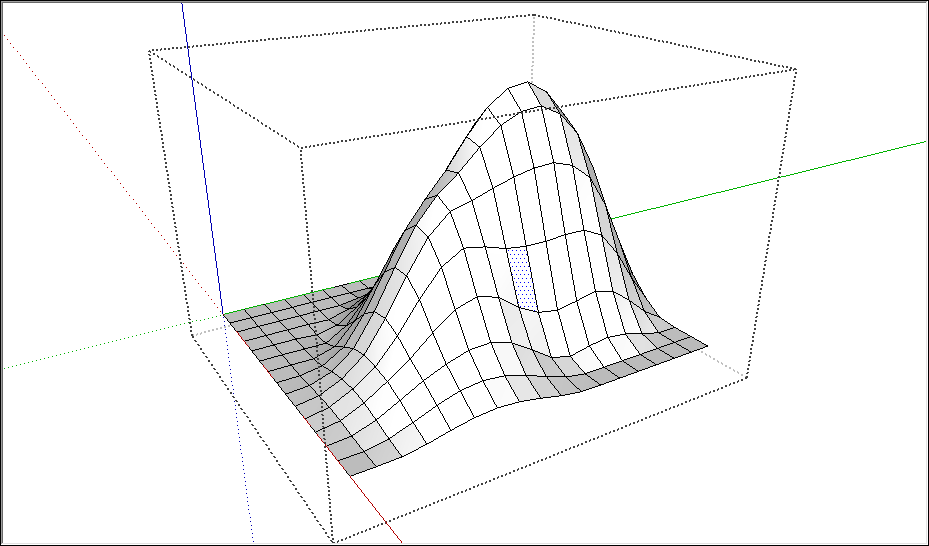
You can repeat this process as much as you like to sculpt your terrain. For example, the following terrain has been smooved to resemble a ski slope (or a large nose emerging from the earth, depending on how you look at it).您可以根据需要重复此过程来雕刻地形。例如,以下地形已被平滑,类似于滑雪坡(或从地球上露出的大鼻子,取决于你如何看待它)。
Detailing terrain地形细节
Ideally, a TIN contains the fewest lines and faces necessary to create the shape of your terrain (or whatever you decide to model with the TIN). With that in mind, the Add Detail tool splits existing triangles into smaller ones — but only where you need them.理想情况下,三角网包含创建地形形状(或使用三角网建模的任何形状)所需的最少线条和面。考虑到这一点,“添加细节”工具将现有三角形拆分为更小的三角形,但仅限于您需要的地方。
For example, say you wanted to add moguls to your terrain. Although the Add Detail tool isn’t so handy at forming powerful movie producers, it’s perfect for creating small bumps on the ski slope terrain shown in the preceding section. 例如,假设你想在你的地形中添加大亨。虽然“添加细节”工具在组建强大的电影制作人方面并不那么方便,但它非常适合在前一节所示的滑雪坡地形上创建小凸起。With the Add Detail tool, you can split a face into several triangles so that the geometry is detailed enough to create the moguls.使用“添加细节”工具,您可以将一个面分割成几个三角形,以便几何体足够详细,可以创建大亨。
To add detail to your TIN, follow these steps:要向TIN添加详细信息,请执行以下步骤:
Select the Add Detail tool (在沙盒工具栏上选择“添加细节”工具( ) on the Sandbox toolbar or select Tools > Sandbox > Add Detail from the menu bar. ),或从菜单栏中选择工具>沙盒>添加细节。
You see the Add Detail cursor, and inferences appear where you can divide an edge or face.您将看到“添加细节”游标,并在可以分割边或面的地方显示推论。Click an edge or face where you want to create a new vertex, as shown in the following figure.单击要创建新顶点的边或面,如下图所示。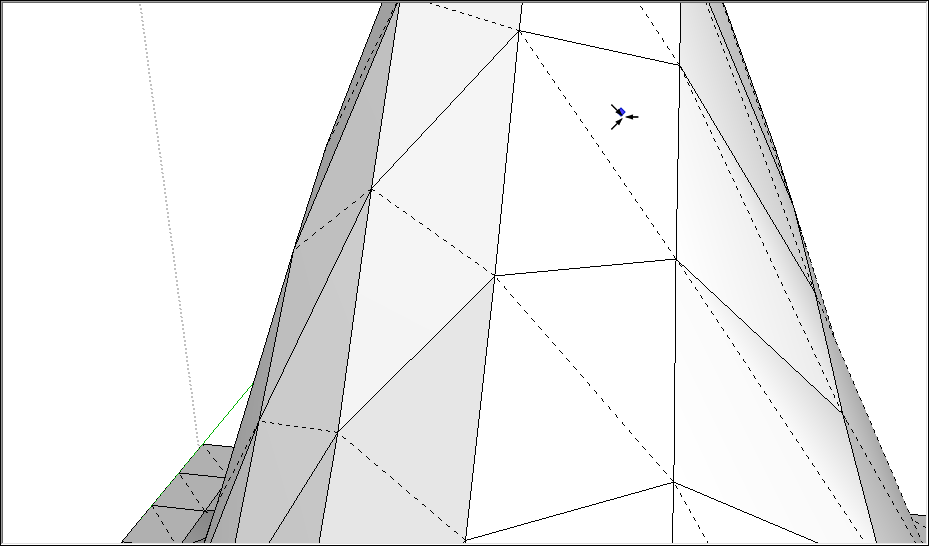
When the cursor changes to up and down arrows, move the cursor up or down to adjust the height of the vertex and the surrounding triangles, as shown in the following figure. Or use the Measurements box to type a precise offset distance.当游标变为上下箭头时,向上或向下移动游标以调整顶点和周围三角形的高度,如下图所示。或者使用“测量”框键入精确的偏移距离。Note:You can hold down the Shift key to move the geometry horizontally, but the result is nonfunctional terrain, as explained at the beginning of this article.您可以按住Shift键水平移动几何体,但结果是非功能地形,如本文开头所述。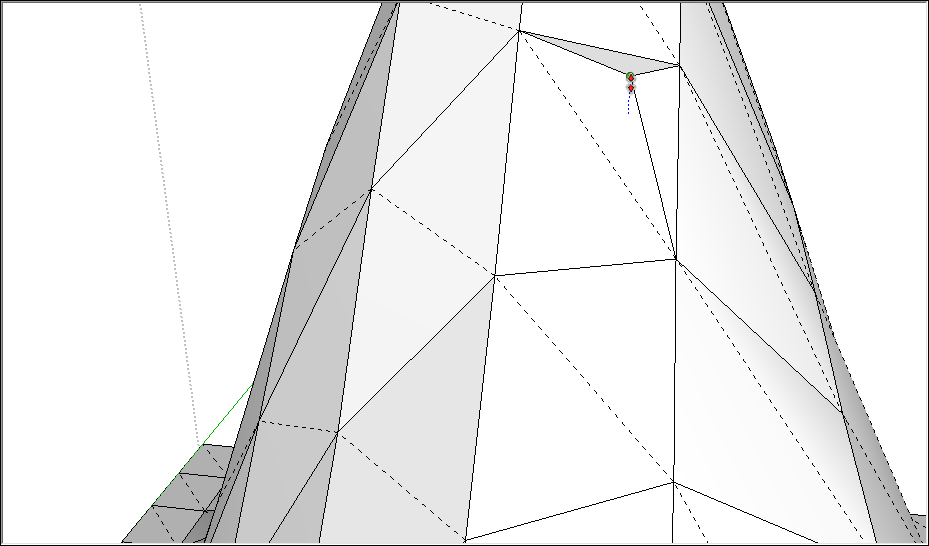
Click to set the vertex height.单击以设置顶点高度。
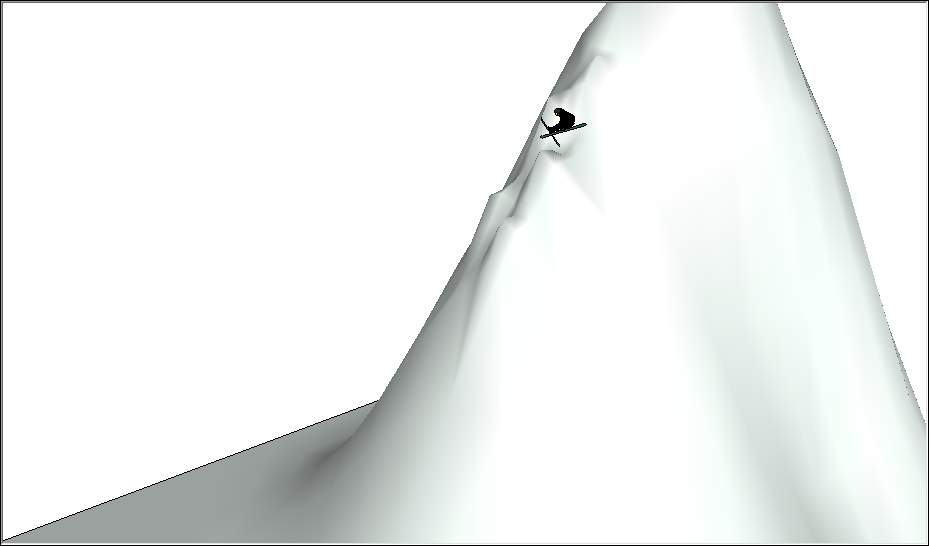
After you add enough detail, you can create more detailed features with the Smoove tool. 添加足够的细节后,您可以使用Smoove工具创建更详细的特征。In the following figure, you see the ski slope after adding the moguls, applying a color material, smoothing and softening the geometry, and adding a 2D skier component for scale.在下图中,您可以看到添加雪上滑板、应用颜色材质、平滑和软化几何体以及添加2D滑雪者组件以进行缩放后的滑雪坡。
Flipping edges翻转边缘
If you see undesirable flat areas after you convert contours to a terrain, the Flip Edge tool helps you fix the problem.如果在将轮廓转换为地形后看到不需要的平坦区域,翻转边缘工具可以帮助您解决问题。
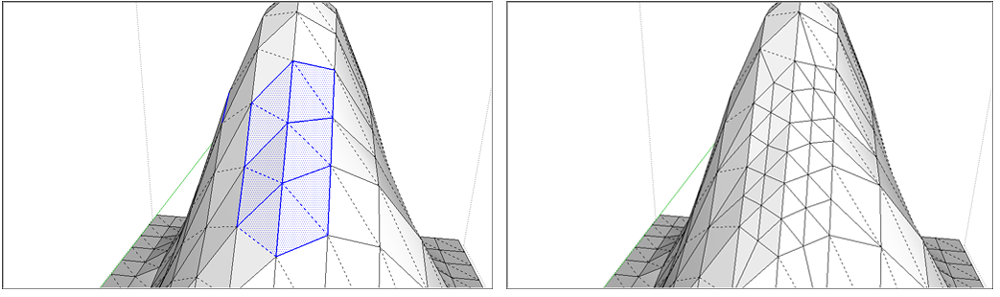
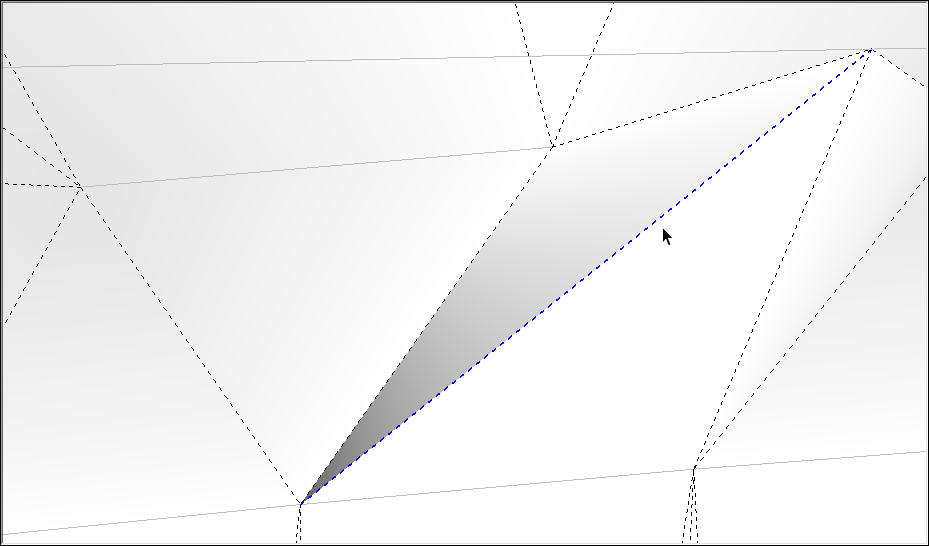
First, make sure hidden geometry is visible by selecting View > Hidden Geometry. Edges that need to be flipped look something like the selected edge in the following figure, which is creating a peak where the surface should be smooth.首先,通过选择“视图>隐藏几何体”来确保隐藏几何体可见。需要翻转的边看起来像下图中的选定边,它在表面应该平滑的地方创建了一个峰值。
To fix the edge, select the Flip Edge tool (要固定边,请选择“翻转边”工具(![]() ) and click the edge with its cursor. After doing so, you can see how the triangles form a more regular pattern in the following figure.
) and click the edge with its cursor. After doing so, you can see how the triangles form a more regular pattern in the following figure. ![]() ),然后用游标单击边。完成此操作后,您可以在下图中看到三角形如何形成更规则的图案。
),然后用游标单击边。完成此操作后,您可以在下图中看到三角形如何形成更规则的图案。In this example, you may need to flip a few more edges before area is completely smooth.在这个例子中,在区域完全平滑之前,您可能需要再翻转几条边。
