Viewing a Model查看模型
As you create a model in 3D, you need to view it from all sides. In SketchUp, you orbit, zoom, and pan all the time as you draw:当您创建3D模型时,您需要从各个角度查看它。在SketchUp中,您在绘制时始终可以进行动态观察、缩放和平移:
Orbit:轨道:When you orbit, you move around, above, or below your model. Orbiting is like flying around your model Peter Pan–style.当你进行轨道运动时,你可以在模型的上方或下方移动。轨道飞行就像在你的模型彼得潘周围飞行。Zoom:缩放:Zoom in to focus on a specific area as you draw, and zoom out to see more of your model.放大以在绘图时聚焦于特定区域,缩小以查看更多模型。Pan:平移:When you pan, you move left, right, up, or down.当你平移时,你会向左、向右、向上或向下移动。
To see how these tools work, check out the overview in the following video, or read the upcoming sections for steps that guide you in using these tools.要了解这些工具的工作原理,请查看以下视频中的概述,或阅读接下来的部分,了解指导您使用这些工具的步骤。
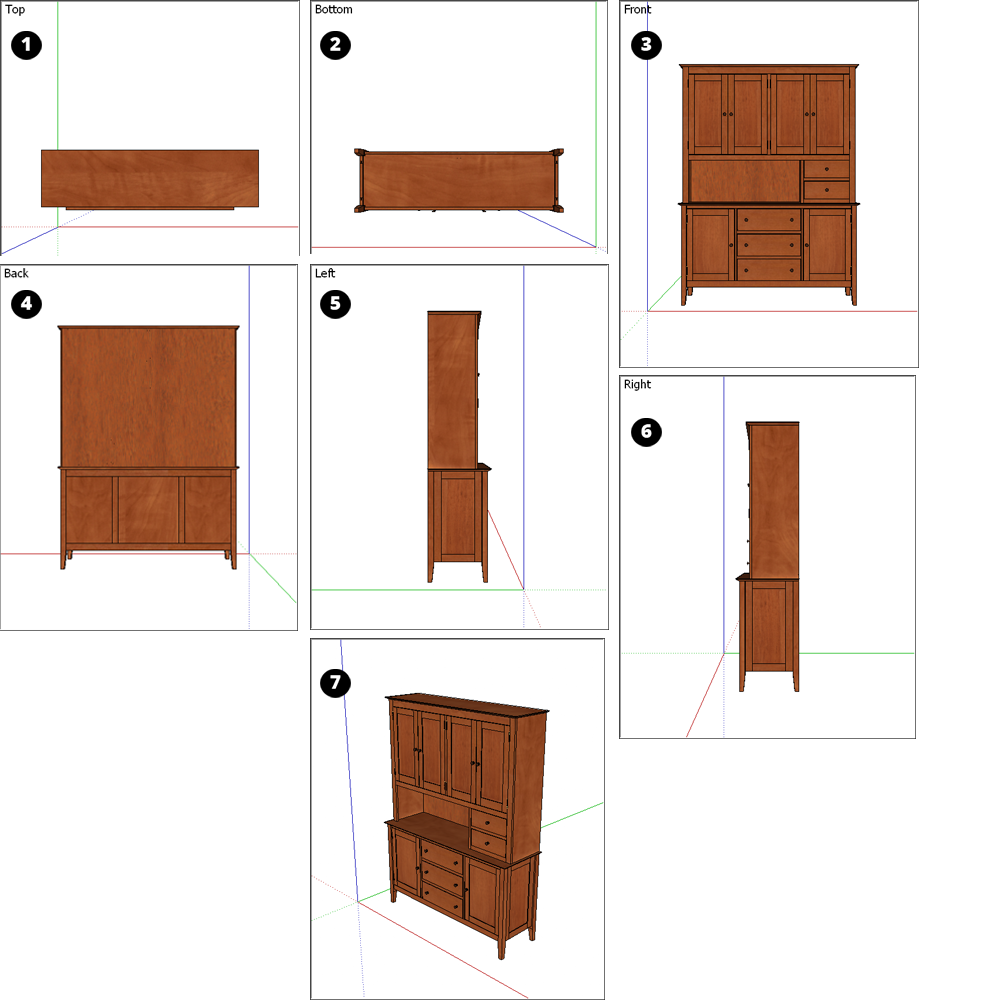
In addition to the navigation tools, SketchUp includes several standard views, which you find on the Camera menu. In the following figure, you see how a model looks in each of the standard views: Top (Callout 1), Bottom (2), Front (3), Back (4), Left (5), Right (6), and Iso (7).除了导航工具外,SketchUp还包括几个标准视图,您可以在“相机”菜单上找到这些视图。在下图中,您可以看到模型在每个标准视图中的外观:顶部(详图索引1)、底部(2)、前部(3)、后部(4)、左侧(5)、右侧(6)和Iso(7)。
SketchUp’s Camera menu also has three perspective options, shown in the following figure, that change how you view your model:SketchUp的“相机”菜单还有三个透视选项,如下图所示,可以更改查看模型的方式:
Parallel Projection:平行投影:In this view, lines appear parallel in both 3D and 2D space. This view is also known as an orthographic view. When you print in this view, line length has a scale (for example 4’ in SketchUp = 1" on paper). (Callout 1)在此视图中,线在三维和二维空间中都显示为平行。此视图也称为正交视图。在此视图中打印时,线条长度有一个比例(例如SketchUp中的4'在纸上=1")。(标注1)Perspective:透视:In this view, lines vanish to a horizon, so certain items appear closer while other items appear to be far away. Entities are not to scale. This is SketchUp’s default view. (Callout 2)在这种视图中,线条消失在地平线上,因此某些项目看起来更近,而其他项目看起来很远。实体不能按比例缩放。这是SketchUp的默认视图。(详图2)Two-Point Perspective:两点透视:Illustrators often use two-point perspective to draw 3D buildings and concept art. In SketchUp, choosing this view aligns your perspective so that the view has two vanishing points. (Callout 3)插画师经常使用两点透视来绘制3D建筑和概念艺术。在SketchUp中,选择此视图会对齐您的透视图,使视图有两个消失点。(详图3)
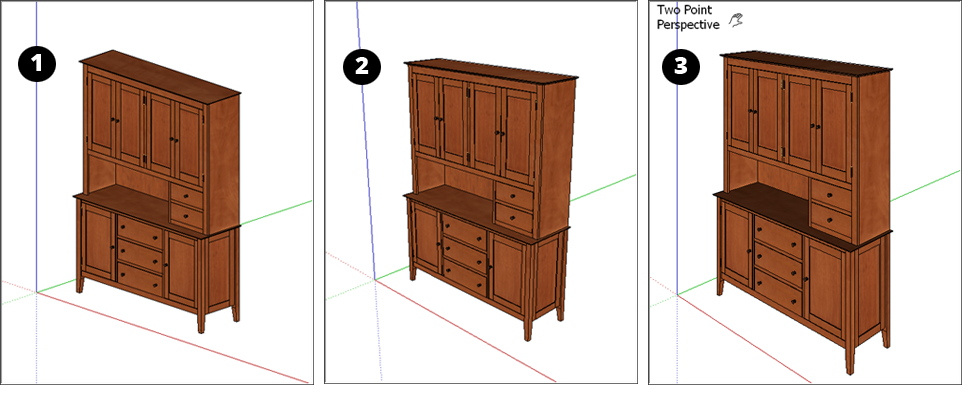
Table of Contents目录
Orbiting around a 3D model围绕3D模型旋转
Orbiting enables you to view geometry from the outside. To rotate the camera about a model, activate the Orbit tool (轨道使您能够从外部查看几何体。要围绕模型旋转相机,请激活“动态观察”工具(![]() ), which you find in the following areas of the SketchUp interface:
), which you find in the following areas of the SketchUp interface:![]() ),该工具位于SketchUp界面的以下区域:
),该工具位于SketchUp界面的以下区域:
Camera > Orbit on the menu bar菜单栏上的“相机”>“动态观察”Camera toolbar (Microsoft Windows)相机工具栏(Microsoft Windows)Getting Started toolbar入门工具栏Large Tool Set toolbar大工具集工具栏Tool palette (macOS)工具选项板(macOS)
Tip: You can temporarily activate the Orbit tool while in any other tool (except the Walk tool):您可以在使用任何其他工具(漫游工具除外)时临时激活“动态观察”工具:
On a three-button mouse:在三键鼠标上:Click and hold the scroll wheel.单击并按住滚轮。On a one-button mouse:在单按钮鼠标上:If you use macOS, press and hold the Control and Command keys while clicking and holding the left mouse button.如果您使用macOS,请在按住鼠标左键的同时按住Control和Command键。
To orbit using the Orbit tool, follow these steps:要使用“动态观察”工具进行动态观察,请执行以下步骤:
Select the Orbit tool (选择“动态观察”工具( ) or press the O key.)或按O键。
Click anywhere in the drawing area.单击绘图区域中的任意位置。Move your cursor in any direction to rotate around the center of the drawing area.沿任意方向移动游标,以围绕绘图区域的中心旋转。
Beyond basic orbiting, the Orbit tool can do a few other tricks:除了基本的轨道运行,轨道工具还可以执行其他一些技巧:
To center a model in the drawing area,若要将模型居中放置在绘图区域中,double-click in the drawing area.请在绘图区域中双击。To roll the camera on its side as you orbit,在绕轨道运行时,将相机侧翻,press and hold the Ctrl key (Microsoft Windows) or Option key (macOS). This suspends the Orbit tool’s built-in sense of gravity, which keeps vertical edges pointed up and down.按住Ctrl键(Microsoft Windows)或Option键(macOS)。这将暂停“动态观察”工具的内置重力感,使垂直边保持上下指向。
Panning side to side and up and down左右摆动,上下摆动
When you pan, SketchUp’s camera (your view) moves vertically or horizontally. Here’s where you find the Pan tool (平移时,SketchUp的相机(您的视图)会垂直或水平移动。您可以在此处找到“平移”工具(![]() ):
):![]() ):
):
Camera > Pan on the menu bar菜单栏上的“相机”>“平移”Camera toolbar (Microsoft Windows)相机工具栏(Microsoft Windows)Getting Started toolbar入门工具栏Large Tool Set toolbar大工具集工具栏Tool palette (macOS)工具选项板(macOS)
Tip: You switch to the Pan tool temporarily while you’re in another tool:当您在另一个工具中时,您会暂时切换到“平移”工具:
On a three-button scroll wheel mouse, hold down the scroll wheel and the left mouse button.在三按钮滚轮鼠标上,按住滚轮和鼠标左键。On a one-button mouse or trackpad, press and hold the Control, Command, and Shift keys simultaneously while holding down the mouse button.在单键鼠标或触控板上,按住鼠标按钮的同时同时按住Control、Command和Shift键。On any mouse, if the Orbit tool is selected, press and hold the Shift key.在任何鼠标上,如果选择了“动态观察”工具,请按住Shift键。
To pan using the Pan tool, follow these steps:要使用“平移”工具平移,请执行以下步骤:
Select the Pan tool (选择“平移”工具( ) or press the H key.)或按H键。
In the drawing area, click and drag the cursor in any direction.在绘图区域中,单击并沿任意方向拖动游标。
Zooming in and out放大和缩小
In SketchUp, as in many other programs, you can zoom in for an extreme close up, or zoom out to see the bigger picture. As you draw a 3D model, zooming in can help you align edges and faces more precisely, whereas zooming out enables you to see your overall model or re-orient yourself so you can find a different part of your model to work on.在SketchUp中,与许多其他程序一样,您可以放大以获得极近的特写,也可以缩小以查看更大的图片。在绘制3D模型时,放大可以帮助您更精确地对齐边和面,而缩小可以让您看到整个模型或重新定位自己,以便找到模型的不同部分进行处理。
SketchUp also has two specialized zoom tools, Zoom Extents (SketchUp还有两个专门的缩放工具,最大化显示(![]() ) and Zoom Window (
) and Zoom Window (![]() ), which you learn about later in this section.
), which you learn about later in this section.![]() )和缩放窗口(
)和缩放窗口(![]() ),您将在本节稍后了解。
),您将在本节稍后了解。
In the SketchUp interface, here’s where you find the Zoom tool (在SketchUp界面中,您可以在此处找到缩放工具(![]() ):
):![]() ):
):
Camera > Zoom on the menu bar菜单栏上的“相机”>“缩放”Camera toolbar (Microsoft Windows)相机工具栏(Microsoft Windows)Getting Started toolbar入门工具栏Tool palette (macOS)工具选项板(macOS)
To zoom in and out, follow these steps:要放大和缩小,请执行以下步骤:
Select the Zoom tool (选择“缩放”工具( ) or press the Z key.)或按Z键。
Click and drag up to zoom in; click and drag down to zoom out. When you zoom by dragging the Zoom tool cursor, SketchUp zooms in or out from the center of the screen.点击并向上拖动以放大;单击并向下拖动以缩小。通过拖动缩放工具游标进行缩放时,SketchUp会从屏幕中心放大或缩小。
To instantly make your whole model visible and centered in the drawing area, click the Zoom Extents tool (要立即使整个模型可见并居中显示在绘图区域中,请单击“最大化显示”工具(![]() ) or press Shift+Z.
) or press Shift+Z. ![]() )或按Shift+Z。
)或按Shift+Z。You find Zoom Extents in the following corners of the SketchUp interface:您可以在SketchUp界面的以下角落找到最大化显示:
Camera > Zoom Extents on the menu bar菜单栏上的“摄影机”>“最大化显示”Camera toolbar (Microsoft Windows)相机工具栏(Microsoft Windows)Getting Started toolbar入门工具栏Large Tool Set toolbar大工具集工具栏Tool palette (macOS)工具选项板(macOS)
To zoom in on a specific rectangular portion of your model, use the Zoom Window tool. (You find Zoom Window in the same places where you find the Zoom and Zoom Extents tools, with the exception of the Getting Started toolbar.) To zoom in on a portion of your model:要放大模型的特定矩形部分,请使用“缩放窗口”工具。(除了“入门”工具栏外,您可以在找到“缩放”和“最大化显示”工具的相同位置找到“缩放窗口”。)要放大模型的一部分:
Select the Zoom Window tool (选择“缩放窗口”工具( ).)。
).)。Click and drag to make a box appear around the area that you want to zoom in on. When you release the mouse button, everything in the box you drew fills the drawing area.单击并拖动,使一个框出现在您要放大的区域周围。当您释放鼠标按钮时,您绘制的框中的所有内容都会填充绘图区域。
Changing the field of view or focal length更改视野或焦距
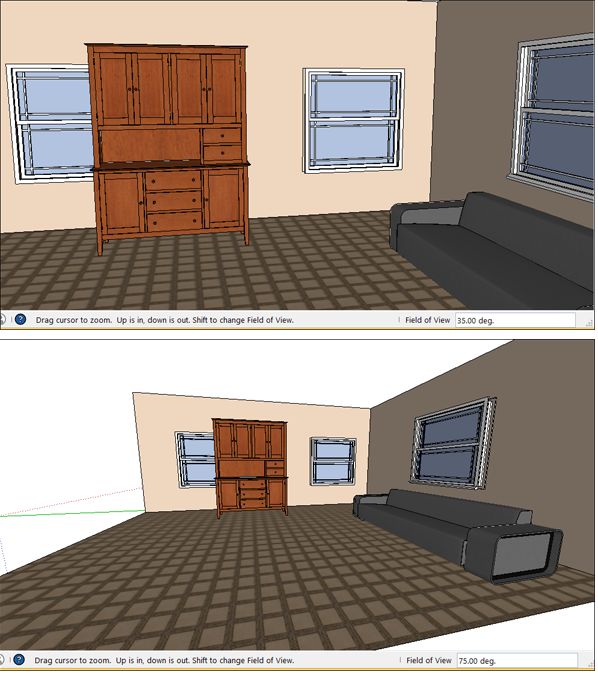
A lesser-known Zoom tool feature is changing the field of view, or how much of your model you can see. Because your view in SketchUp is like looking through a camera, you can adjust the field of view in degrees. Alternatively, change the focal length using millimeters, as you do in a camera.一个鲜为人知的缩放工具功能是改变视野,或者你可以看到模型的多少。因为SketchUp中的视图类似于通过相机查看,所以可以按度数调整视野。或者,使用毫米更改焦距,就像在相机中一样。
To adjust the field of view or focal length, follow these steps:要调整视野或焦距,请执行以下步骤:
Select the Zoom tool or press the Z key. You can also select Camera > Field of View from the menu bar.选择缩放工具或按Z键。您还可以从菜单栏中选择“相机”>“视野”。Type a value in degrees or millimeters, respectively. For example, typing 45 deg sets a 45 degree field of view; typing 35 mm sets a focal length equivalent to a 35mm camera.分别键入以度或毫米为单位的值。例如,键入45deg可设置45度视场;键入35mm可以设置相当于35毫米相机的焦距。Or, to visually adjust the field of view, hold down the Shift key while dragging the Zoom tool.或者,要直观地调整视野,请在拖动缩放工具的同时按住Shift键。
Setting a standard view设置标准视图
You can immediately change the drawing window to any of the standard views by selecting Camera > Standard Views and selecting your desired view from the submenu. 通过选择“摄影机>标准视图”并从子菜单中选择所需的视图,可以立即将绘图窗口更改为任何标准视图。Your options are as follows: Top (Callout 1), Bottom (Callout 2), Front (Callout 3), Back (Callout 4), Left (Callout 5), Right (Callout 6), and Iso (Callout 7). See an example of each one in the following figure.您的选项如下:顶部(标注1)、底部(标注2)、前部(标注3)、后部(标注4)、左侧(标注5)、右侧(标注6)和Iso(标注7)。请参阅下图中的每个示例。
Returning to a previous view返回上一视图
SketchUp remembers your views as you move from one to the next. To return to the preceding view, select Camera > Previous. After you return to a view, you can move to a later view by selecting Camera > Next.SketchUp会在您从一个视图移动到另一个视图时记住您的视图。要返回上一个视图,请选择“摄影机>上一个”。返回视图后,可以通过选择“摄影机”>“下一步”移动到稍后的视图。